Comprender el acabado lapado: Qué es y por qué es importante
Cuando vi por primera vez las superficies con acabado lappato en una exclusiva sala de exposiciones de Milán hace cinco años, me sorprendió de inmediato que ocuparan un punto intermedio perfecto entre las superficies totalmente pulidas y las completamente mates. Esa característica distintiva -una superficie semipulida con una textura sutil y una reflectividad moderada- define la técnica lappato.
Lappato, derivado de la palabra italiana que significa "lapeado" o "semipulido", representa un sofisticado enfoque de acabado que se aplica principalmente a baldosas de gres porcelánico, piedras naturales y determinadas superficies de ingeniería. A diferencia de un pulido de alto brillo, que aplana completamente la superficie, el acabado lappato conserva parte de la textura natural del material, al tiempo que proporciona un suave brillo que atrapa la luz.
La técnica surgió cuando diseñadores y arquitectos buscaron alternativas a la elección binaria entre superficies completamente mates o pulidas a espejo. Marco Bianchi, un reputado experto italiano en acabados de superficies al que consulté durante un proyecto reciente, explicó que "el acabado lappato surgió cuando los fabricantes reconocieron el deseo de los consumidores de una elegancia sutil: superficies que reflejen la luz sin volverse crudas o clínicas."
Esta técnica de acabado ha ganado gran popularidad en el diseño contemporáneo por varias razones de peso:
- Llamamiento práctico: Las superficies Lappato ofrecen una mayor resistencia al deslizamiento en comparación con las opciones totalmente pulidas, al tiempo que resultan más fáciles de limpiar que los acabados totalmente mates.
- Profundidad visual: La naturaleza semipulida crea un interesante juego de luces a través de la superficie, añadiendo dimensión a los espacios.
- Versatilidad: El acabado complementa los esquemas de diseño tradicionales y modernos, funcionando maravillosamente en entornos residenciales y comerciales por igual.
- Retención de la textura: Mantiene las sutiles características de textura del material original, preservando la autenticidad al tiempo que añade refinamiento.
Lo que distingue al lappato de otros acabados es su ejecución. En lugar de pulir hasta conseguir un acabado de espejo, el proceso implica el uso de herramientas abrasivas especializadas que eliminan el material justo para crear un brillo uniforme y sutil, preservando al mismo tiempo la textura y profundidad naturales de la superficie. El resultado es un sofisticado efecto visual cada vez más solicitado por los diseñadores en proyectos de alta gama.
Según un estudio del Natural Stone Institute, los materiales con acabado lappato han experimentado un aumento de 37% en las especificaciones de proyectos comerciales de alta gama en los últimos tres años. Esta tendencia se alinea con los movimientos de diseño más amplios que favorecen los materiales que mantienen la conexión con las texturas naturales al tiempo que ofrecen cualidades estéticas refinadas.
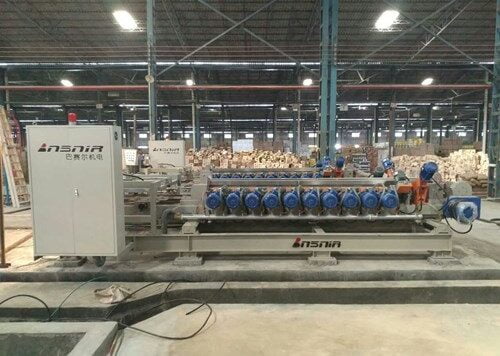
Para conseguir un verdadero acabado lappato, se necesitan herramientas especializadas diseñadas específicamente para esta técnica. BASAIR Tecnología ha desarrollado herramientas abrasivas de diamante avanzadas que hacen que este acabado, antes especializado, sea más accesible a una gama más amplia de profesionales. Comprender cómo utilizar estas herramientas de forma eficaz requiere tanto conocimientos técnicos como experiencia práctica, que es precisamente lo que trataremos en esta completa guía.
Herramientas y materiales abrasivos esenciales de Lappato
Antes de profundizar en las técnicas específicas, es fundamental conocer las herramientas especializadas que hacen posible el acabado lappato. En el corazón de este proceso se encuentran las herramientas abrasivas de diamante lappato fickert, que difieren significativamente de los abrasivos de pulido estándar en su composición y patrones de corte.
La principal herramienta que necesitarás es un diamante lappato fickert abrasivo con 170mm de longitud de trabajoque incluye partículas de diamante cuidadosamente calibradas incrustadas en un aglomerante de resina o metal. Estas herramientas están diseñadas específicamente para crear el efecto semipulido que define el acabado lappato.
Al seleccionar los abrasivos, deberá tener en cuenta varias progresiones de grano:
| Gama de granos | Función principal | Efecto superficie | Lo mejor para |
|---|---|---|---|
| 36-60 | Eliminación agresiva de material | Establece la planitud básica | Superficies rugosas e irregulares |
| 80-120 | Alisado intermedio | Elimina los arañazos visibles, empieza a desarrollar un ligero brillo | Superficies trabajadas anteriormente |
| 220-400 | Perfeccionamiento | Crea un efecto inicial lappato, aspecto de poco brillo | Desarrollo del acabado semipulido |
| 800-1500 | Acabado final | Mejora la reflectividad controlada, conserva la textura | Completar el look lappato |
| 3000+ | Aplicaciones especializadas | Crea un brillo ligeramente superior manteniendo el carácter lappato | Proyectos de alta calidad que requieren un mayor refinamiento |
Además de los propios abrasivos fickert, necesitará:
Equipamiento:
- Una pulidora calibrada con ajustes de presión regulables
- Sistema de suministro de agua (para el pulido en húmedo, que es lo más habitual en el trabajo lappato).
- Accesorio de aspiración para la gestión del polvo
- Manómetro digital para una aplicación uniforme
Material de apoyo:
- Soluciones de limpieza (pH neutro)
- Paños de microfibra para inspección
- Compuestos de preparación de superficies
- Productos de sellado (específicos para cada material)
Equipo de seguridad:
- Respirador o mascarilla antipolvo (incluso con pulido húmedo)
- Protección ocular
- Protección auditiva
- Calzado antideslizante
- Guantes de goma para manipulación de productos químicos
Un aspecto que a menudo se pasa por alto es la selección de los tipos de aglomerante adecuados para los abrasivos. Lo aprendí por las malas al abordar un gran proyecto comercial con baldosas de gres porcelánico que presentaban variaciones inesperadas de densidad. El director técnico de BASAIR me explicó que los abrasivos con aglomerante metálico suelen proporcionar una acción de corte más agresiva, mientras que las herramientas con aglomerante de resina ofrecen mejores características de acabado.
Para saber cómo utilizar eficazmente las herramientas abrasivas lappato hay que empezar por seleccionar la secuencia de granos adecuada para cada material. A diferencia del pulido estándar, en el que se puede pasar por todos los granos disponibles, el acabado lappato implica a menudo una selección estratégica de granos para lograr ese aspecto semipulido característico.
Una consideración importante es que los distintos materiales requieren enfoques personalizados. Por ejemplo, los azulejos de porcelana suelen necesitar una progresión de granulado diferente a la del mármol natural o el granito. Cuanto más duro sea el material, más importante será evitar saltarse granos en la progresión.
Un aspecto técnico que a menudo se pasa por alto es la relación entre la exposición al abrasivo y la dureza del aglomerante. Como señala Jacob Werner, del Stone Finishing Technology Institute, "el error más común es utilizar herramientas con una dureza de aglomerante inadecuada para el material específico, lo que provoca un desgaste prematuro de la herramienta o un refinamiento insuficiente de la superficie."
Paso 1: Preparación y evaluación de la superficie
Antes de aplicar cualquier herramienta abrasiva a una superficie, es esencial realizar una preparación y evaluación adecuadas. Este primer paso crítico determina el grano de partida y el enfoque general.
Empiece limpiando a fondo la superficie para eliminar cualquier resto, polvo o residuo que pueda interferir con la acción abrasiva o rayar la superficie. Para la mayoría de los materiales, lo ideal es un limpiador de pH neutro, ya que los productos ácidos o alcalinos pueden reaccionar con determinadas composiciones de piedra.
A continuación, evalúe el estado de la superficie. Yo suelo pasar la palma de la mano por el material mientras lo miro desde distintos ángulos bajo una luz intensa. Esto ayuda a identificar:
- Zonas irregulares o juntas entre baldosas
- Arañazos o daños existentes
- Variaciones de la densidad del material
- Acabados aplicados en fábrica que puede ser necesario eliminar
Para una evaluación cuantitativa en proyectos de mayor envergadura, considere la posibilidad de utilizar un rugosímetro. Estos aparatos proporcionan lecturas objetivas que ayudan a determinar el grano de partida. En un proyecto comercial reciente, este método ahorró mucho tiempo al identificar las zonas que requerían un trabajo inicial más intensivo.
El estado de la superficie determina el grano de partida:
| Estado de la superficie | Grano inicial recomendado | Notas |
|---|---|---|
| Porcelana acabada en fábrica | 120-220 | La mayoría de los acabados de fábrica requieren una preparación mínima |
| Piedra natural desbastada | 36-60 | Empezar con granos más agresivos para una eliminación sustancial del material |
| Superficies previamente pulidas | 220-400 | Empezar más fino para conservar la planitud existente |
| Superficies con desprendimientos/desigualdades | 36-80 | Abordar primero los problemas de planitud antes del perfeccionamiento |
No se precipite en esta fase de evaluación. Como descubrí en un difícil proyecto de mármol en 2021, empezar con un grano demasiado fino en una superficie irregular daba resultados inconsistentes que requerían retroceder y trabajo adicional.
Marque las zonas problemáticas con cinta adhesiva fácil de quitar o rotuladores lavables, y considere la posibilidad de crear un mapa de superficies para proyectos de mayor envergadura a fin de garantizar un tratamiento coherente durante todo el proceso.
Paso 2: Configurar la máquina y el entorno de trabajo
La configuración adecuada de la máquina y las condiciones ambientales son fundamentales para el éxito del pulido lappato. Unos pequeños ajustes en esta fase pueden influir drásticamente en los resultados.
En primer lugar, configure su pulidora en función del material con el que trabaje. Esto implica:
Ajustes de presión: A diferencia del pulido tradicional, que puede utilizar la máxima presión, las técnicas lappato suelen requerir una presión más moderada. Para la mayoría de los materiales, comience con 65-75% de presión máxima de la máquina. He descubierto que una presión excesiva puede eliminar la sutil textura que confiere al lappato su carácter distintivo.
Configuración RPM: Ajuste su máquina entre 450-600 RPM inicialmente. Las velocidades más altas generan más calor, lo que puede ser problemático para ciertos materiales y resinas. Durante mi trabajo en una instalación de mármol blanco sensible a la temperatura, reducir las RPM en solo 50 puntos eliminó el ligero efecto amarillento que estábamos experimentando.
Montaje de herramientas: Asegúrese de que las herramientas abrasivas están perfectamente niveladas. Incluso pequeños desequilibrios pueden crear patrones de acabado desiguales que se hacen evidentes en determinadas condiciones de iluminación. Utilice un nivel para verificar la posición de la herramienta antes de empezar.
El propio entorno de trabajo requiere una cuidadosa consideración:
Gestión del agua: Para el pulido en húmedo (recomendado para la mayoría de las aplicaciones lappato), establezca un caudal de agua que mantenga la superficie constantemente húmeda sin crear encharcamientos. Muy poca agua aumenta la fricción y el calor; demasiada diluye la lechada que ayuda en el proceso de pulido.
Consideraciones sobre la temperatura: La temperatura del material influye en su respuesta a los abrasivos. En entornos más fríos (por debajo de 60°F/15°C), es posible que tenga que ajustar su técnica, ya que algunos materiales se vuelven más quebradizos. Por el contrario, a altas temperaturas, algunas piedras son más sensibles a los choques térmicos.
Iluminación: Instale una iluminación temporal adecuada que revele la superficie desde múltiples ángulos. La luz rastrillada (luz colocada en un ángulo bajo respecto a la superficie) es especialmente eficaz para supervisar el progreso.
Organización del espacio de trabajo: Organice su espacio de trabajo de modo que pueda avanzar metódicamente por la superficie sin pisar las zonas recién acabadas. Yo suelo marcar caminos claros con cinta adhesiva para los proyectos más grandes.
Daily Run Book: Elabore un cuaderno en el que se documenten los ajustes de presión, los caudales de agua y las revoluciones por minuto de cada grano. Esto resulta muy valioso para mantener la coherencia, especialmente en proyectos que abarcan varios días.
Antes de empezar el trabajo de pulido propiamente dicho, realice una pequeña zona de prueba en un lugar poco visible. Esto le permitirá confirmar que sus decisiones de configuración producen el efecto deseado en el material específico con el que está trabajando.
Un aspecto que a menudo se pasa por alto es el acondicionamiento de las herramientas. Abrasivos diamantados de calidad profesional con especificaciones técnicas europeas a veces se benefician de un breve periodo de "rodaje" en una superficie de sacrificio para optimizar su rendimiento antes de aplicarlos a la zona del proyecto.
Paso 3: Técnicas de aplicación inicial del abrasivo
La aplicación inicial de herramientas abrasivas sienta las bases de todo el proceso de acabado lappato. Esta fase crítica requiere atención al detalle y precisión técnica.
Comience con el grano inicial adecuado en función de la evaluación de la superficie. Para la mayoría de las superficies preacabadas, suele estar en el rango 80-120, aunque los materiales más rugosos pueden requerir empezar con herramientas de grano 36-60 más agresivas.
Utilizar eficazmente las herramientas abrasivas lappato en esta fase implica dominar varias técnicas clave:
Patrones de movimiento:
A diferencia de los movimientos orbitales aleatorios utilizados en algunas aplicaciones de pulido, el acabado lappato suele emplear pasadas lineales solapadas. He descubierto que los resultados más consistentes se obtienen manteniendo un solapamiento de 30-40% entre pasadas. Esto crea una abrasión uniforme sin crear patrones visibles en la superficie acabada.
Para superficies más grandes, establezca un patrón de cuadrícula sistemático que garantice una cobertura completa. En un reciente proyecto comercial de 1.000 metros cuadrados, dividimos el suelo en secciones por colores para controlar el progreso y mantener una técnica uniforme en todo momento.
Gestión de la presión:
La presión constante es esencial. Muchos profesionales cometen el error de aplicar una presión excesiva en un intento de acelerar el proceso. Por ensayo y error, he descubierto que una presión moderada y constante produce mejores resultados que los métodos agresivos.
Las máquinas modernas ofrecen lecturas digitales de la presión, pero desarrollar un sentido táctil de la presión adecuada tiene un valor incalculable. Cuando trabajo con las herramientas fickert de diamante de BASAIR, he descubierto que funcionan de forma óptima con 25-30 kg de presión para la mayoría de los materiales, bastante menos de lo que se suele utilizar para un acabado de pulido completo.
Consideraciones sobre la velocidad:
El ajuste de RPM de su máquina interactúa con su velocidad de movimiento a través de la superficie. Como regla general:
- Para granos iniciales (más gruesos): Mover a aproximadamente 1,5-2 metros por minuto
- Para granos intermedios: Lento a 1-1,5 metros por minuto
- Para granos de acabado: Reducir a 0,75-1 metro por minuto
Esta ralentización progresiva permite que los granos más finos desarrollen plenamente la calidad de superficie que usted busca.
Seguimiento de los primeros indicadores:
Las pasadas iniciales revelan información importante sobre cómo responde el material a su enfoque. Esté atento:
- Patrones de arañazos uniformes que indican una abrasión constante
- Color de la lechada de agua (una lechada más oscura suele indicar una mayor eliminación de material).
- Cambios en el aspecto de la superficie a medida que trabaja
- Cambios de resistencia percibidos a través de la máquina
Durante esta fase, es fundamental detenerse periódicamente, limpiar una pequeña sección con agua limpia y evaluar los progresos. Utilice luz de rastrillo para examinar la superficie desde múltiples ángulos.
Una técnica que mejoró notablemente mis resultados es lo que los artesanos italianos llaman "doble pasada": una pasada completa en una dirección y una segunda pasada perpendicular a la primera. Así se consigue una abrasión más uniforme sin cambiar de grano.
Recuerde que el objetivo del acabado lappato no es eliminar toda la textura, sino crear una superficie controlada y refinada con una sutil reflexión de la luz. Su aplicación abrasiva inicial debe establecer la planitud mientras comienza a desarrollar esta característica calidad semipulida.
Paso 4: Transiciones progresivas de grano
El arte del acabado lappato surge cuando se domina la transición entre granos abrasivos. A diferencia de los regímenes de pulido completos que pueden progresar a través de 8-10 niveles de grano, las técnicas lappato a menudo emplean saltos estratégicos de grano para mantener la textura mientras se desarrolla una reflectividad controlada.
El primer principio que hay que entender es que cada grano debe eliminar por completo el patrón de arañazos del anterior antes de avanzar. Tras completar el trabajo con cada grano, limpie a fondo una zona de prueba con agua clara y examínela bajo la luz de un rastrillo. Busque:
- Patrón de rayado uniforme consistente con su grano actual
- Eliminación completa de arañazos más profundos de granos anteriores
- Aspecto homogéneo en toda la superficie
He desarrollado una sencilla pero eficaz "prueba de rotura con agua" para evaluar la consistencia de la superficie. Salpique una pequeña cantidad de agua limpia sobre la superficie; si la superficie está preparada de manera uniforme, debería extenderse uniformemente sin gotear ni romperse.
Para la mayoría de las aplicaciones lappato, una progresión de granulado típica podría seguir este patrón:
| Etapa Grit | Propósito | Indicadores visuales de finalización | Errores comunes que hay que evitar |
|---|---|---|---|
| Grueso (50-80) | Establecer la planitud, eliminar las marcas de fabricación | Patrón de arañazos uniforme, sin estrías profundas | Apresurarse en el aplanamiento inicial |
| Media (120-220) | Comenzar a desarrollar el refinamiento de la superficie | La superficie comienza a mostrar una sutil reflectividad | Aplicar una presión excesiva, que puede eliminar la textura |
| Fino (400-800) | Desarrollar el aspecto característico lappato | Superficie semirreflectante con textura preservada | Trabajo excesivo de la superficie hacia el pulido total |
| Final (1000-1500) | Mejorar la reflectividad controlada manteniendo la textura | Distintivo acabado lappato con suave reflejo de la luz | Usar un grano demasiado fino, creando un aspecto totalmente pulido |
La clave del éxito de las transiciones consiste en saber cuándo hay que detenerse en cada paso. Esto se consigue con la experiencia, pero hay señales visuales que ayudan:
En el caso de las baldosas de gres porcelánico, la superficie desarrollará un sutil brillo antes de volverse totalmente reflectante. Deténgase en este punto para mantener el carácter lappato. Con piedras naturales como el mármol, notará que la superficie desarrolla lo que los artesanos italianos llaman "luna": un suave brillo similar al de la luna en lugar de reflejarse como un espejo.
Durante mi trabajo en un proyecto residencial de gama alta con travertino, descubrí que prolongar el tiempo con el grano 400 reduciendo la presión creaba un efecto lappato especialmente atractivo. Esta técnica, que ahora llamo "morada", consiste en pasar 20-30% más de tiempo con granos de transición críticos a presión reducida.
Entre cada cambio de grano, es esencial una limpieza a fondo. Cualquier partícula residual de granos anteriores puede crear arañazos profundos difíciles de eliminar posteriormente. Yo utilizo un método de limpieza en tres pasos:
- Enjuague inicial con agua para eliminar la mayor parte del lodo
- Limpieza de la superficie con un paño de microfibra
- Inspección final y limpieza puntual de cualquier residuo restante
Un aspecto distintivo del acabado lappato en comparación con el pulido completo implica lo que yo llamo "salto estratégico de grano". En algunos casos, sobre todo con baldosas de gres porcelánico, saltar directamente del grano 400 al 1000 crea el efecto semipulido ideal. Esta técnica requiere experiencia para ejecutarla correctamente, pero puede producir resultados superiores en los acabados lappato.
Paso 5: Conseguir efectos semipulidos
La característica distintiva del acabado lappato es su aspecto semipulido, un delicado equilibrio entre mate y alto brillo que crea profundidad visual al tiempo que preserva la textura de la superficie. Conseguir este efecto de forma consistente requiere técnicas específicas y una cuidadosa observación.
Lo que distingue el verdadero lappato del simple "pulido incompleto" es la intencionalidad en el proceso. No se trata de no pulir del todo, sino de crear un acabado distintivo con su propio valor estético. Esta distinción me quedó clara cuando trabajé con artesanos venecianos que abordaban el lappato como una forma de arte específica y no como un mero paso intermedio.
Para conseguir el efecto semipulido ideal:
Controle su perfil de presión:
A medida que progreses a granos más finos (normalmente 800-1500 para el aspecto final lappato), reduce gradualmente la presión. Yo he tenido éxito con la técnica de "presión escalonada":
- Empezar con 25-30 kg de presión para las primeras pasadas
- Reducir a 20-22 kg para los pases intermedios
- Terminar con una presión muy ligera (15-18 kg) para las últimas pasadas.
Este enfoque graduado desarrolla la reflectividad sin eliminar los elementos texturales que dan al lappato su carácter.
Domina la técnica del "beso":
Para el granulado final, los artesanos italianos utilizan lo que llaman la técnica del "bacio" o beso, un contacto extremadamente ligero y breve que afina la superficie sin aplanarla del todo. Esto implica:
- Presión más ligera que la aplicación estándar
- Movimiento ligeramente más rápido por la superficie
- Menos pasadas que para un pulido completo
He descubierto que Herramientas de acabado de piedra semipulida que minimizan el rayado de la superficie son especialmente eficaces para esta técnica, ya que su distribución de partículas de diamante está optimizada para una abrasión controlada.
Trabaja con la luz:
El atractivo visual de Lappato procede de su interacción con la luz. Periódicamente, durante su trabajo de granallado final, limpie las zonas de prueba y examínelas bajo diferentes condiciones de iluminación:
- Iluminación superior directa
- Luz rastrillada desde ángulos bajos
- Luz natural (si es posible)
- Fuentes de luz artificial que se utilizarán en la instalación final
Esta inspección multiángulo ayuda a garantizar que el acabado tenga el aspecto deseado en condiciones de iluminación reales.
Errores comunes que hay que evitar:
A través de mis propias pruebas y errores, he identificado varios escollos que pueden comprometer el efecto lappato:
- Pulido excesivo: Trabajar demasiado tiempo con granos finos puede crear inadvertidamente zonas totalmente pulidas. Controle el progreso con frecuencia y deténgase cuando consiga el efecto deseado.
- Presión inconsistente: Una presión variable en la superficie crea una reflectividad desigual. Mantenga una presión constante mediante los ajustes de la máquina y un funcionamiento cuidadoso.
- Modulación de velocidad incorrecta: Moverse demasiado despacio con los granos finos suele provocar un pulido excesivo. Para obtener acabados lappato auténticos, aumente ligeramente la velocidad de movimiento con los granos más finos.
- Selección inadecuada del grano: El uso de granos demasiado finos (más de 1500 para la mayoría de las aplicaciones) tiende a crear un pulido completo en lugar de un efecto lappato.
Durante un exigente proyecto con paneles de porcelana de gran formato, descubrí que alternando pasadas perpendiculares con el granallado final se conseguía un aspecto lappato más uniforme que trabajando en una sola dirección. Esta técnica, aunque requiere mucho tiempo, produce una reflexión de la luz excepcionalmente equilibrada en toda la superficie.
Recuerde que los distintos materiales muestran el efecto lappato de forma diferente. La porcelana tiende a ofrecer resultados más consistentes, mientras que las piedras naturales como el mármol o el granito muestran más variaciones en su presentación semipulida debido a las diferencias en la composición mineral.
Paso 6: Retoques finales y evaluación de la superficie
La fase final del acabado lappato implica una evaluación meticulosa y un trabajo de retoque para garantizar un resultado uniforme y de alta calidad. Esta fase separa el trabajo de calidad profesional del acabado meramente aceptable.
Empiece limpiando a fondo toda la superficie con agua limpia y un limpiador de pH neutro para eliminar todos los residuos del pulido. Deje que la superficie se seque por completo; esto es crucial, ya que la humedad puede ocultar imperfecciones o inconsistencias en el acabado.
Una vez seco, realice una evaluación exhaustiva en múltiples condiciones de iluminación:
Inspección visual:
Examine la superficie desde distintos ángulos y distancias. Creo que tanto la inspección de cerca como la observación a una distancia de entre 1,5 y 1,5 metros proporcionan información complementaria. Busque:
- Reflectividad uniforme en toda la superficie
- Presentación uniforme de las texturas
- Ausencia de marcas de remolino o arañazos visibles
- Aspecto equilibrado del efecto semipulido
Evaluación táctil:
Pase la yema de los dedos por la superficie para detectar inconsistencias que no sean visibles. La textura debe ser homogénea en toda la superficie, sin zonas rugosas o demasiado lisas.
Prueba de reflexión de la luz:
Esta técnica ha demostrado ser muy valiosa en numerosos proyectos. Coloque una fuente de luz potente (yo utilizo una luz de trabajo LED de 5000K) en un ángulo bajo con respecto al suelo y muévala lentamente por el perímetro mientras observa los patrones de reflexión. Cualquier inconsistencia en el acabado se hará inmediatamente evidente como irregularidades en la forma en que la luz se refleja en la superficie.
Para las zonas que requieren retoques, he desarrollado una técnica de repintado puntual:
- Limpiar y secar bien la zona
- Enmascare las secciones circundantes que no requieran trabajo
- Utilizar esponjas abrasivas manuales del grano adecuado, trabajando con pequeños movimientos circulares.
- Difuminar los bordes de la zona de retoque con el acabado circundante.
- Volver a limpiar y evaluar
Cuando trate pequeñas imperfecciones, resista la tentación de utilizar granos demasiado gruesos. Empiece con un grano ligeramente más fino de lo que crea necesario y evalúe los resultados antes de pasar a opciones más agresivas.
Durante un gran proyecto comercial en Chicago, nos encontramos con "puntos calientes" inesperados de excesiva reflectividad en ciertas zonas. En lugar de repasar todo el suelo, conseguimos corregirlos utilizando una técnica que aprendí de un artesano portugués: un ligero pulido con una almohadilla abrasiva no tejida muy fina (similar a una almohadilla de limpieza blanca estándar) humedecida con agua. Este enfoque sutil redujo suavemente el sobrepulido localizado sin crear transiciones perceptibles.
La documentación es crucial en esta fase, sobre todo en los proyectos comerciales. Se lo recomiendo:
- Fotografía de la superficie terminada con iluminación estándar
- Documentar cualquier área que haya recibido una atención especial
- Registrar el aspecto final para futuras referencias en caso de que sea necesario realizar tareas de mantenimiento.
Paso 7: Mantenimiento y protección
La longevidad y la belleza de un acabado lappato dependen en gran medida de una protección y un mantenimiento adecuados una vez finalizado el trabajo de pulido inicial. Este último paso suele pasarse por alto, pero resulta crucial para obtener resultados duraderos.
Protección inmediata tras el pulido:
Después de que la evaluación final confirme unos resultados satisfactorios, la superficie requiere una protección inmediata antes del tráfico peatonal o de la continuación de las obras. Mi protocolo estándar incluye:
- Limpieza a fondo con un limpiador de pH neutro formulado específicamente para piedra o porcelana
- Secado completo con aire comprimido (nunca con pistolas de calor, que pueden provocar estrés térmico).
- Aplicación de un sellador adecuado en función del tipo de material
La decisión de sellado depende del material:
| Tipo de material | Tipo de sellador recomendado | Método de aplicación | Tiempo de curado | Consideraciones especiales |
|---|---|---|---|---|
| Porcelana | Normalmente innecesario, excepto para variedades texturadas o porosas | Aplicación de microfibra ligera si es necesario | 2-4 horas | Pruebe primero en una zona pequeña para asegurarse de que no se enturbie |
| Mármol/Piedra caliza | Sellador impregnante de aspecto natural | Dos capas ligeras, húmedo sobre húmedo | 24 horas como mínimo | Puede realzar ligeramente el color; pruébelo primero |
| Granito | Sellador penetrante con protección antimanchas | Una sola capa, pulido después de 10 minutos | 6-12 horas | Menos crítico que para piedras más porosas |
| Piedra artificial | Normalmente innecesario | N/A | N/A | Algunas variedades se benefician de los selladores de realce ligero |
La experiencia me ha enseñado que un sellado excesivo puede ser tan problemático como un sellado insuficiente. Un toque ligero con productos de alta calidad da mejores resultados que una aplicación intensa de selladores de calidad inferior.
Recomendaciones de mantenimiento continuo:
A mis clientes les proporciono una guía de mantenimiento personalizada que suele incluir:
- Limpieza diaria/regular: Utilizar únicamente limpiadores de pH neutro formulados específicamente para piedra o porcelana. Advierto explícitamente contra los limpiadores ácidos (incluido el vinagre), los productos a base de amoniaco y los polvos abrasivos.
- Limpieza profunda periódica: Limpieza profesional programada cada 6-12 meses dependiendo de los niveles de tráfico.
- Calendario de resellado: En función del tipo de material y de los patrones de tráfico, suele oscilar entre una vez al año para espacios comerciales muy transitados y cada 3-5 años para instalaciones residenciales.
- Protocolos de tratamiento localizado: Instrucciones para solucionar problemas comunes como derrames, rozaduras o pequeños arañazos sin dañar el acabado lappato.
Durante una visita de seguimiento a un proyecto residencial de alta gama seis meses después de su finalización, me di cuenta de que el propietario estaba utilizando un producto de limpieza muy popular que contenía ácido cítrico, que estaba grabando sutilmente su superficie de mármol lappato. Esta experiencia me enseñó a proporcionar a los clientes tanto productos recomendados como una lista de productos que no deben utilizarse.
Para las instalaciones comerciales, ahora incluyo una sesión de formación sobre mantenimiento con el personal de las instalaciones. Este enfoque práctico ha reducido significativamente las devoluciones relacionadas con un mantenimiento inadecuado.
Una innovación de mantenimiento que he incorporado recientemente consiste en "refrescar" periódicamente las superficies lappato utilizando almohadillas de mantenimiento especializadas en lugar de repulirlas. Este enfoque menos invasivo mantiene el carácter semipulido distintivo sin alterar el acabado cuidadosamente calibrado.
Estudio de caso: Ejecución de proyectos comerciales
En 2022, dirigí un equipo que aplicó el acabado lappato en un vestíbulo comercial de 4.500 pies cuadrados utilizando baldosas de gres porcelánico de gran formato diseñadas para imitar el mármol Calacatta. Este proyecto ilustraba muchos de los principios tratados en esta guía, al tiempo que presentaba retos únicos que requerían técnicas de adaptación.
Antecedentes del proyecto:
El arquitecto especificó un acabado semipulido que proporcionara un sutil reflejo de la luz y, al mismo tiempo, mantuviera la resistencia al deslizamiento en un entorno de mucho tránsito. Las baldosas seleccionadas llegaron con un acabado mate de fábrica que requería el procesado lappato in situ.
Desafíos de la evaluación inicial:
Nuestras pruebas preliminares revelaron que la densidad de las baldosas no era homogénea, probablemente debido a variaciones en el proceso de prensado. Esto supuso un reto importante, ya que los mismos parámetros de pulido produjeron resultados diferentes en las distintas baldosas.
Abordamos esta cuestión creando un detallado sistema de mapeo, clasificando cada baldosa en uno de los tres grupos de densidad mediante pruebas de absorción. Esto nos permitió modificar nuestro planteamiento para cada categoría:
- Grupo A (mayor densidad): Requiere mayor tiempo de trabajo con cada grano
- Grupo B (densidad media): Enfoque de tratamiento estándar
- Grupo C (menor densidad): Requiere menor presión y menor tiempo de permanencia
Selección y adaptación de herramientas:
Seleccionamos herramientas fickert de diamante lappato diseñadas específicamente para porcelana. Tras las pruebas iniciales, modificamos nuestra progresión de granos original de una secuencia estándar de 80-120-220-400-800-1500 a una progresión personalizada de 80-220-800 que producía el efecto semipulido deseado de forma más eficiente, al tiempo que mantenía la uniformidad en las variaciones de densidad.
Retos técnicos y soluciones:
- Condiciones ambientales:
El sistema de calefacción, ventilación y aire acondicionado del edificio creaba patrones de secado desiguales que afectaban a nuestra capacidad para evaluar los resultados de forma coherente. Aplicamos un planteamiento basado en zonas, utilizando barreras temporales y deshumidificadores portátiles para crear secciones controladas para el procesamiento. - Limitaciones de tiempo:
Con un apretado calendario de 14 días, necesitábamos optimizar la productividad sin comprometer la calidad. Desarrollamos un sistema de saltos en el que los equipos especializados en granos específicos se desplazaban por el espacio en secuencia, maximizando la eficiencia y garantizando al mismo tiempo la aplicación uniforme de la técnica. - Procesamiento de bordes:
Las zonas perimetrales que requerían un tratamiento manual mostraban inicialmente diferencias notables con las zonas centrales tratadas a máquina. Desarrollamos una técnica de transición utilizando equipos más pequeños para las zonas de los bordes, creando una mezcla perfecta entre las secciones trabajadas a máquina y a mano.
Sistema de control de calidad:
Hemos implantado un proceso de control de calidad de tres niveles:
- Los jefes de equipo realizaron inspecciones iniciales después de cada progresión de granos
- El jefe de proyecto realizó inspecciones secundarias de las secciones terminadas
- Un especialista independiente en control de calidad realizó la inspección final en diversas condiciones de iluminación
Este sistema detectaba las incoherencias en una fase temprana, lo que reducía las repeticiones y garantizaba resultados uniformes.
Comentarios de los clientes y lecciones aprendidas:
Una vez terminado, el cliente se mostró especialmente satisfecho con el equilibrio logrado entre el refinamiento estético y la funcionalidad práctica. La superficie proporcionó la sofisticación visual que buscaban, manteniendo al mismo tiempo la resistencia al deslizamiento necesaria para la seguridad pública.
La lección más valiosa de este proyecto fue la importancia de adaptar las técnicas en función de las variaciones de los materiales. En lugar de forzar un enfoque estandarizado en toda la instalación, reconocer y acomodar las diferencias de material resultó crucial para lograr resultados coherentes.
Seis meses más tarde, una visita de seguimiento reveló excelentes patrones de desgaste y un aspecto consistente a pesar del intenso tráfico peatonal, validando tanto nuestro enfoque técnico como nuestras recomendaciones de mantenimiento.
Técnicas avanzadas y resolución de problemas
Después de dominar el pulido lappato básico, explorar técnicas avanzadas puede elevar sus resultados de satisfactorios a excepcionales. Estos enfoques abordan problemas comunes y amplían su capacidad para manejar aplicaciones especializadas.
Trabajar con materiales difíciles:
Algunos materiales presentan dificultades únicas para el acabado lappato. A base de ensayo y error, he desarrollado métodos específicos para superficies problemáticas:
1. Porcelanas de alta dureza (Mohs 7+):
Estos materiales extremadamente densos pueden resistir la progresión abrasiva estándar. He tenido éxito utilizando lo que yo llamo una técnica de "ciclos de presión", alternando entre periodos de presión estándar (25-30 kg) y breves intervalos de presión más alta (35-40 kg) con el mismo grano. Así se consigue una abrasión más eficaz sin correr el riesgo de dañar la superficie con una presión alta continua.
2. Materiales veteados:
Las piedras o porcelanas con vetas pronunciadas suelen pulirse de forma desigual porque las distintas composiciones minerales responden de forma diferente a los abrasivos. Para estos materiales, recomiendo:
- Reducción de las RPM en 10-15% a partir de los ajustes estándar
- Aumento del caudal de agua para mejorar la refrigeración y la lubricación
- Utilizar la técnica de "progresión dividida": trabajar las zonas más blandas con un grano más alto que las zonas circundantes más duras.
3. Piedras tratadas con resina:
Algunas piedras naturales contienen rellenos de resina aplicados en fábrica que pueden mancharse o volverse pegajosos durante el pulido. Para estos materiales:
- Mantener las temperaturas superficiales más bajas mediante el aumento del caudal de agua
- Utilice abrasivos especializados diseñados para piedras tratadas con resina
- Aplicar ciclos de pulido más cortos con periodos de enfriamiento entre pasadas.
Problemas comunes y soluciones:
**Reflejo desigual
Preguntas frecuentes sobre el uso de las herramientas abrasivas lappato
Q: ¿Qué son y cómo funcionan las herramientas abrasivas lappato?
R: Las herramientas abrasivas Lappato son herramientas especializadas que se utilizan principalmente para pulir superficies de cerámica y piedra natural. Se fabrican con resina de diamante u otros materiales abrasivos y están diseñadas para conseguir un acabado semipulido único. Estas herramientas funcionan eliminando material de la superficie mediante un proceso abrasivo controlado, lo que da como resultado un aspecto brillante pero refinado.
Q: ¿Cómo selecciono el abrasivo lappato adecuado para mi proyecto?
R: Para elegir el abrasivo lappato adecuado hay que tener en cuenta el material con el que se trabaja, el acabado deseado y la durabilidad de la herramienta. Los abrasivos de diamante son adecuados para superficies duras como el granito y las baldosas de cerámica, mientras que los materiales más blandos pueden requerir carburo de silicio o alúmina. Asegúrese de que su proveedor ofrece una gama de tamaños de grano para conseguir el nivel de pulido deseado.
Q: ¿Cuáles son los pasos clave para utilizar eficazmente las herramientas abrasivas lappato?
R: Para utilizar eficazmente las herramientas abrasivas lappato, siga estos pasos:
- Asegúrese de que la superficie esté limpia y libre de contaminantes.
- Utilice patrones de presión y movimiento coherentes.
- Calibrar los ajustes de la máquina según el material y el acabado deseado.
- Mantenga un caudal de agua adecuado para evitar el sobrecalentamiento.
Q: ¿Cuáles son los errores más comunes que deben evitarse al utilizar herramientas abrasivas lappato?
R: Los errores más comunes al utilizar herramientas abrasivas lappato incluyen aplicar una presión desigual, una refrigeración por agua inadecuada y saltarse secuencias de granos necesarias. Esto puede provocar acabados inconsistentes, sobrecalentamiento o desgaste de la herramienta. Asegúrese de calibrar correctamente la máquina y siga una progresión de granos coherente para evitar estos problemas.
Q: ¿Pueden utilizarse las herramientas abrasivas lappato para superficies cerámicas y de piedra natural?
R: Sí, las herramientas abrasivas lappato son versátiles y pueden utilizarse tanto en superficies cerámicas como de piedra natural. Sin embargo, la elección del material abrasivo y la secuencia de granos deben ajustarse en función de la dureza y el tipo de material que se vaya a pulir. Los abrasivos diamantados suelen ser adecuados para materiales más duros como el granito y la cerámica, mientras que las piedras más blandas pueden requerir configuraciones diferentes.
Recursos externos
- Abrasivos Lappato para baldosas cerámicas - Este recurso proporciona una guía paso a paso sobre el uso de abrasivos lappato para superficies cerámicas, centrándose en la selección de las herramientas y técnicas adecuadas para conseguir un acabado semipulido perfecto.
- Uso de abrasivos Lappato en piedra natural - Ofrece las mejores prácticas para el uso de abrasivos lappato en piedra natural, incluida la selección de la secuencia de granos adecuada y la aplicación de técnicas que se adapten al tipo de piedra.
- Comprender los abrasivos Lappato de BASAIR - Una completa guía sobre los abrasivos lappato de BASAIR, en la que se detallan sus principales características, ventajas y cómo elegir la herramienta adecuada para las distintas aplicaciones.
- La guía definitiva de las herramientas abrasivas de pulido Lappato - Explora los fundamentos técnicos y las aplicaciones prácticas de las herramientas abrasivas lappato, proporcionando información sobre su uso en el pulido de superficies de cerámica y piedra.
- Alender Lappato Abrasivo - Presenta las herramientas abrasivas lappato de Alender, centrándose en su uso en el pulido de diversos tipos de azulejos y en las ventajas de conseguir un acabado semipulido.

